Updated: Jul 21

Azure hub-and-spoke networking gives you one place to control traffic while keeping workloads separated. In this hands-on lab, you will build a hub VNet, two spoke VNets, an Azure Firewall Basic policy, custom routes, and two private Ubuntu test VMs. You will prove that Azure Firewall blocks traffic by default, then allow only SSH from the application spoke to the data spoke.
Estimated time: 45–60 minutes
Region: West Europe
Difficulty: Beginner
Estimated lab cost: about €0.38 per hour, plus minimal disk and data charges. Complete the cleanup section immediately after the tests.
LEARNING OBJECTIVES
By the end of this workshop, you will be able to:
• Design a non-overlapping hub-and-spoke IP plan.
• Create Azure VNets and connect spokes to a hub with VNet peering.
• Explain why peering is non-transitive.
• Send spoke traffic through a centralized Azure Firewall with user-defined routes.
• Add a default-deny firewall policy exception for one approved flow.
• Validate routes and connectivity with Run Command and effective routes.
• Delete the complete lab safely.
PREREQUISITES
You need an Azure subscription where you can create virtual networks, public IP addresses, route tables, network interfaces, virtual machines, firewall policies, and Azure Firewall. You also need permission to run commands on Azure VMs.
This workshop intentionally does not use VPN Gateway, Bastion, Virtual WAN, Azure Virtual Network Manager, infrastructure as code, or persistent firewall logging.
EXPECTED COST
Azure Firewall is the main cost. At the time of this lab, the West Europe retail rate used for the estimate was approximately €0.346643 per firewall deployment hour, plus €0.057043 per processed GB. Two B1s Linux VMs add approximately €0.021062 per hour, and the two Standard public IPv4 addresses add approximately €0.008776 per hour. The estimated total is about €0.38 per hour before tiny storage and data charges, which stays below the approved €2 ceiling for a one-hour workshop.
Pricing changes over time. Check the Azure pricing calculator before you start, and complete cleanup at the end.
ARCHITECTURE AND IP PLAN
The hub contains the shared firewall. Each spoke contains one workload subnet and one private VM. Spokes are never peered directly.
Hub VNet: vnet-bcwc-hub-weu — 10.0.0.0/16
Azure Firewall subnet: AzureFirewallSubnet — 10.0.0.0/26
Firewall management subnet: AzureFirewallManagementSubnet — 10.0.1.0/26
Application spoke: vnet-bcwc-spoke-app-weu — 10.10.0.0/16
Application workload subnet: snet-app — 10.10.1.0/24
Data spoke: vnet-bcwc-spoke-data-weu — 10.20.0.0/16
Data workload subnet: snet-data — 10.20.1.0/24
Traffic path after routing is enabled:
Application VM → application route table → Azure Firewall → hub peering → data spoke → data VM
KEY CONCEPTS IN PLAIN LANGUAGE
VNet peering creates a private, high-speed connection between two Azure virtual networks. Peering is non-transitive: if App is peered with Hub and Data is peered with Hub, App does not automatically have a direct route to Data.
Forwarded traffic is traffic that did not originate in the VNet forwarding it. Because Azure Firewall receives packets from a spoke and sends them toward another network, forwarded traffic must be allowed on the peering links.
A user-defined route, or UDR, overrides Azure’s normal route choice. In this lab, the 0.0.0.0/0 route sends traffic to the firewall’s private IP as a virtual appliance.
A firewall policy stores reusable rule collections. Azure Firewall starts with default-deny behavior: traffic is blocked unless a rule explicitly permits it.
PART 1 — CREATE THE ISOLATED RESOURCE GROUP
1. In the Azure portal, open Resource groups and select Create.
2. Choose your subscription.
3. Enter rg-bcwc-hubspoke-workshop-weu.
4. Select West Europe.
5. Review and create the resource group.
Keep every lab resource in this group. Cleanup then becomes one controlled deletion.
Figure 1. Create an isolated West Europe resource group for the workshop.

①
PART 2 — CREATE THE HUB VNET
1. Open Virtual networks and select Create.
2. On Basics, select rg-bcwc-hubspoke-workshop-weu, enter vnet-bcwc-hub-weu, and choose West Europe.
3. On Address space, set 10.0.0.0/16.
4. Edit the default subnet. Choose the Azure Firewall subnet purpose. Azure names it AzureFirewallSubnet and requires at least /26. Use 10.0.0.0/26.
5. Add another subnet. Choose Firewall Management (forced tunneling). Azure names it AzureFirewallManagementSubnet. Use 10.0.1.0/26.
6. Review and create the hub VNet.
Figure 2. Select the Azure Firewall subnet template and 10.0.0.0/26.

②
Figure 3. Select the management subnet template and 10.0.1.0/26.

③
Figure 4. Verify both required firewall subnets inside the 10.0.0.0/16 hub.

④
PART 3 — CREATE THE SPOKE VNETS
Create vnet-bcwc-spoke-app-weu with address space 10.10.0.0/16. Rename its subnet to snet-app and use 10.10.1.0/24.
Create vnet-bcwc-spoke-data-weu with address space 10.20.0.0/16. Rename its subnet to snet-data and use 10.20.1.0/24.
Never reuse an address range. Overlapping VNets cannot be peered.
Figure 5. Configure the application spoke workload subnet.

⑤
Figure 6. Configure the data spoke workload subnet.

⑥
PART 4 — PEER EACH SPOKE WITH THE HUB
For the application spoke:
1. Open vnet-bcwc-hub-weu, select Peerings, and add a peering to vnet-bcwc-spoke-app-weu.
2. Name the hub side peer-hub-to-app and the spoke side peer-app-to-hub.
3. Keep virtual network access enabled.
4. Enable forwarded traffic in both directions.
5. Do not enable gateway transit.
Repeat for the data spoke with peer-hub-to-data and peer-data-to-hub.
Do not create an application-to-data peering. The spokes must communicate only through the hub security path.
Both hub-to-spoke peerings should report Connected and Fully synchronized.
Figure 7. The application spoke peering is Connected.

⑦
Figure 8. The hub shows Connected peerings to both spokes.

⑧
PART 5 — CREATE THE PRIVATE TEST VMS
Create vm-bcwc-app-weu in vnet-bcwc-spoke-app-weu / snet-app and vm-bcwc-data-weu in vnet-bcwc-spoke-data-weu / snet-data.
For both VMs:
• Image: Ubuntu Server 22.04 LTS
• Size: Standard B1s
• OS disk: Standard SSD
• Authentication: SSH public key
• Public inbound ports: None
• Public IP: None
The VMs receive private addresses 10.10.1.4 and 10.20.1.4 in this deployment. Your final host number may differ, so use the addresses shown on your VM NICs.
Figure 9. The application VM overview confirms there is no public IP.

⑨
PART 6 — DEPLOY AZURE FIREWALL BASIC
1. Search for Firewalls and select Create.
2. Choose rg-bcwc-hubspoke-workshop-weu and West Europe.
3. Enter azfw-bcwc-hub-weu.
4. Select Azure Firewall Basic.
5. Create a new Basic firewall policy named afwp-bcwc-hub-weu.
6. Select vnet-bcwc-hub-weu.
7. Create a Standard static public IP named pip-bcwc-fw-data-weu.
8. Enable the management IP configuration and create pip-bcwc-fw-mgmt-weu.
9. Review and create the firewall.
Basic uses the dedicated management subnet and management public IP for platform operations. Workload traffic still passes through the firewall’s private IP in AzureFirewallSubnet.
Wait until provisioning reports Succeeded. Record the firewall private IP; this lab uses 10.0.0.4.
Figure 10. Configure Azure Firewall Basic, its policy, VNet, and public IPs.

⑩
Figure 11. The deployed firewall shows its Basic tier and private IP.
⑪
PART 7 — CREATE AND ASSOCIATE ROUTE TABLES
Create rt-bcwc-app-weu and rt-bcwc-data-weu in West Europe.
In each route table, add a route:
Route name: route-default-to-azfw
Destination type: IP Addresses
Destination IP addresses/CIDR ranges: 0.0.0.0/0
Next hop type: Virtual appliance
Next hop address: 10.0.0.4
Associate rt-bcwc-app-weu with snet-app. Associate rt-bcwc-data-weu with snet-data.
A 0.0.0.0/0 route is the least-specific IPv4 route. Azure still uses more-specific system routes where they exist. There is no direct spoke-to-spoke peering route, so packets for the other spoke follow this default route to the firewall.
Figure 12. Configure the application spoke default route to the firewall.

⑫
Figure 13. Associate the route tables with the two workload subnets.

⑬
PART 8 — VERIFY EFFECTIVE ROUTES
Open each VM’s network interface, select Effective routes, and verify a row with:
Address prefix: 0.0.0.0/0
Next hop type: Virtual appliance
Next hop IP address: 10.0.0.4
State: Active
If the route is missing, confirm that the correct route table is associated with the workload subnet and wait a minute for propagation.
Figure 14. The application VM NIC has an active default route to the virtual appliance.

⑭
Figure 15. The data VM NIC has the same active default route.

⑮
PART 9 — PROVE DEFAULT DENY
Before creating a firewall rule, open vm-bcwc-app-weu, select Run command, and run:
timeout 5 bash -c '</dev/tcp/10.20.1.4/22' && echo ALLOWED || echo BLOCKED
The expected output is BLOCKED. The route reaches the firewall, but no policy rule permits the connection.
Run the reverse test from vm-bcwc-data-weu:
timeout 5 bash -c '</dev/tcp/10.10.1.4/22' && echo ALLOWED || echo BLOCKED
The expected output is also BLOCKED.
Figure 16. Application-to-data TCP 22 is blocked before the policy rule.

⑯
PART 10 — ALLOW ONLY APPLICATION-TO-DATA SSH
1. Open afwp-bcwc-hub-weu.
2. Select Network rules and add a rule collection.
3. Use collection name rc-allow-app-to-data-ssh, priority 200, action Allow.
4. Add rule allow-app-to-data-ssh.
5. Source type: IP Address.
6. Source: 10.10.0.0/16.
7. Protocol: TCP.
8. Destination ports: 22.
9. Destination type: IP Address.
10. Destination: 10.20.0.0/16.
11. Save the collection and wait for provisioning to finish.
The rule is directional. It permits new TCP 22 connections originating in the application spoke and targeting the data spoke. It does not permit the reverse direction.
Figure 17. Add the directional TCP 22 network rule to the Basic firewall policy.

⑰
PART 11 — RETEST THE APPROVED AND REVERSE FLOWS
Run the application-to-data test again:
timeout 5 bash -c '</dev/tcp/10.20.1.4/22' && echo ALLOWED || echo BLOCKED
Expected result: ALLOWED.
Run the reverse test from the data VM:
timeout 5 bash -c '</dev/tcp/10.10.1.4/22' && echo ALLOWED || echo BLOCKED
Expected result: BLOCKED.
Together, these results prove centralized routing, explicit allow, directionality, and default deny.
Figure 18. Application-to-data TCP 22 succeeds after the rule.

⑱
Figure 19. Data-to-application remains blocked.

⑲
PART 12 — REVIEW THE TOPOLOGY
Open Network Watcher topology or the hub VNet topology view. Confirm that the hub is connected to each spoke and there is no direct spoke-to-spoke peering.
Figure 20. Final hub-and-spoke topology with the firewall in the central hub.

⑳
TROUBLESHOOTING
Peering says Initiated instead of Connected:
Create or synchronize the matching peering in the other VNet. Verify that the address spaces do not overlap.
The effective route is missing:
Check the subnet association on the route table. Wait for route propagation, then refresh the NIC effective routes page.
Both directions are allowed:
Check for a broader network rule, an accidental spoke-to-spoke peering, or a source range that includes the data spoke.
The approved direction still times out:
Confirm the destination VM is running and listening on TCP 22. Verify the rule collection is provisioned, the destination IP is correct, and both peerings allow forwarded traffic.
Run Command stays in progress:
Wait for the Azure VM agent, then retry. Run Command does not require a public IP.
CLEANUP — DELETE EVERYTHING YOU BUILT
Do not skip this section.
1. Capture any screenshots you still need.
2. Open Resource groups and select rg-bcwc-hubspoke-workshop-weu.
3. Review the resource list so you understand what will be removed.
4. Select Delete resource group.
5. Enter rg-bcwc-hubspoke-workshop-weu to confirm.
6. Select Delete and confirm the final prompt.
7. Return to Resource groups, refresh, and verify the group no longer exists.
Deleting the resource group removes the firewall, firewall policy, public IPs, route tables, VNets, NICs, VMs, and disks created by this workshop.
Figure 21. Confirm deletion of the isolated workshop resource group.

㉑
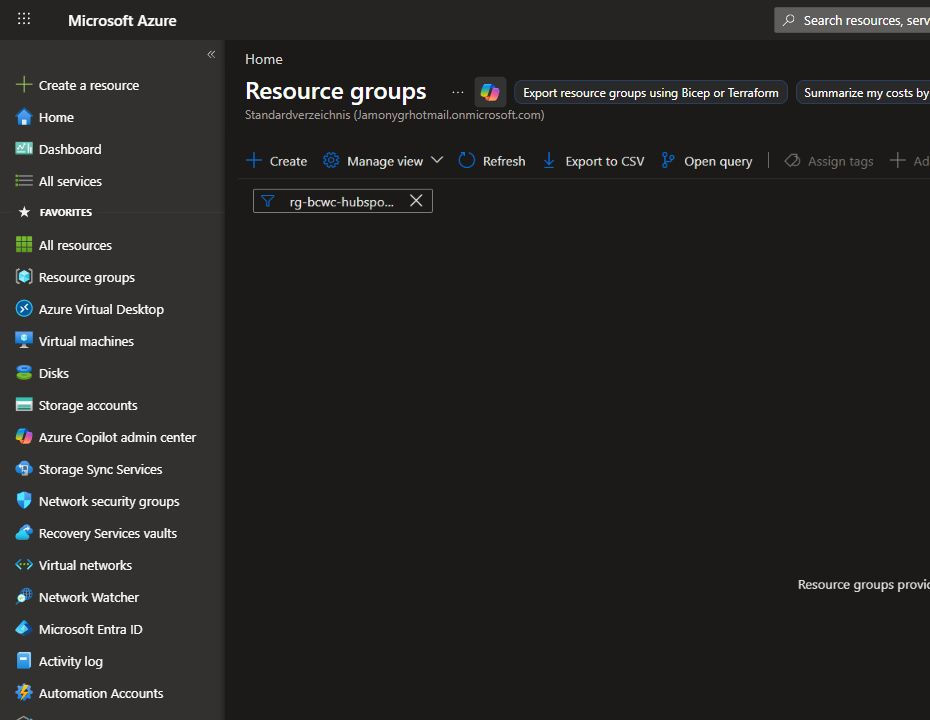
Figure 22. Resource-group search confirms the workshop resources are gone.
㉒
KNOWLEDGE CHECK
1. Why can’t the two spoke VNets communicate automatically through the hub?
Answer: VNet peering is non-transitive.
2. Why is forwarded traffic enabled on the peerings?
Answer: The firewall forwards packets that originated in a different VNet.
3. What does the 0.0.0.0/0 UDR do?
Answer: It sends traffic without a more-specific route to the firewall private IP.
4. Why is data-to-application still blocked after the rule is added?
Answer: The rule permits only connections sourced from 10.10.0.0/16 to TCP 22 in 10.20.0.0/16.
5. What is the safest way to stop workshop charges?
Answer: Delete the isolated workshop resource group and verify it is gone.
NEXT STEPS
For a production design, consider Azure Firewall Standard or Premium, Azure Monitor diagnostics, DNS proxy, multiple availability zones, DDoS Network Protection, network security groups, Azure Bastion, policy-as-code, and Infrastructure as Code with Bicep or Terraform.
Comments